How To Repair And Seal Shower Tile Grout

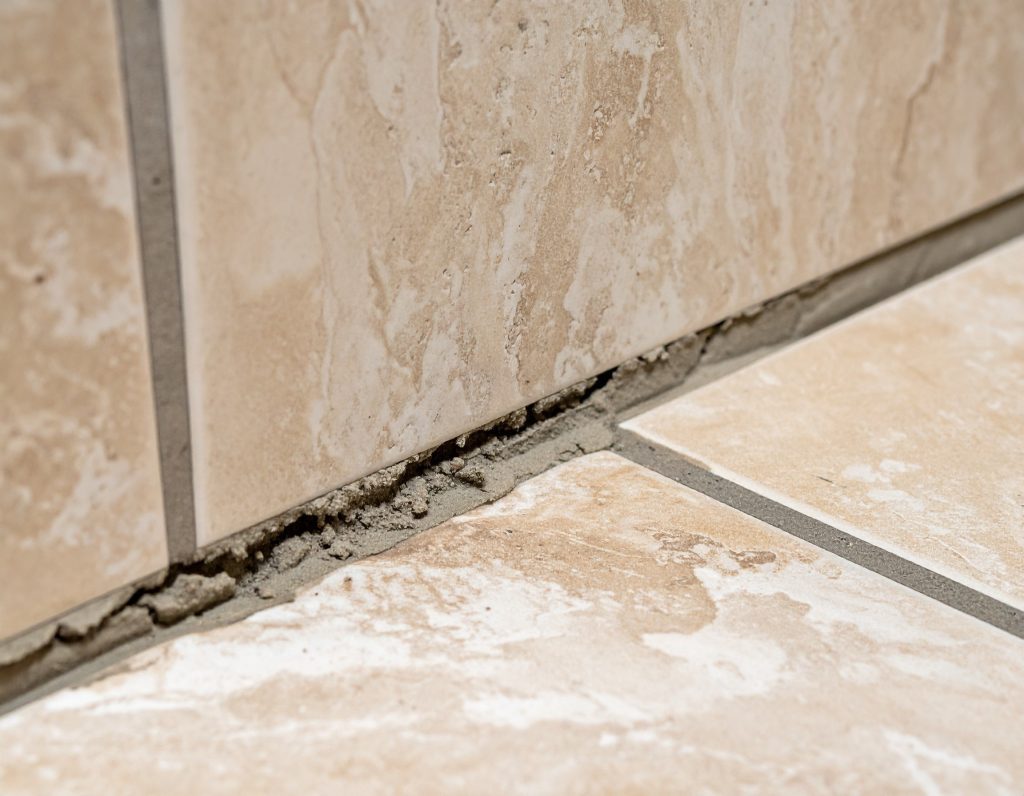
cracked tile grout
Keeping a tiled shower looking good requires regular maintenance. Most people don’t know that shower tile grout must be resealed every 6 months.  If not it becomes porous, absorbs water and can crack causing leaks. Grout can deteriorate from aging, poor installation and expansion from changes in temperature. This can lead to mold behind the tiles, damaged walls and missing grout. It may also require replacing the tiles. Missing grout is a sure sign that re-grouting is needed. Mold and other staining is a sign that your grout needs either cleaning or resealed. Other red flags are a musty smell or obvious water damage and loose tiles. These items need to be addressed to avoid more costly repairs.

Some Tools And Materials Needed for Grout Repair and Resealing

• Grout saw or oscillating tool for removing old grout
• Grout float for applying new grout
• Damp sponge for cleaning excess grout
• Brushes and rags

Materials

• Premixed colored grout
• Bottle of grout sealer
• Silicone caulking
• Cleaning supplies
• Gloves
• Dust mask

Removing Old Damaged Grout

Determine where and how much grout you are going to remove. Grout is removed from between the tiles and the shower pan by scraping with a grout saw or by using a mechanical oscillating tool following the grout lines. Try not to damage any of the tiles and take your time do not rush.

Once your have completed scraping, the area must be cleaned using a brush or the best method is with a vacuum. The area where new grout is to be applied must be clean of all dust and debris so wipe with a damp rag

Applying the new grout

If you will be using powdered grout, mix the grout and tint as needed following directions on the label. If using a premixed grout that is already colored you can start to apply it.

The grout is applied using the grout float. Use the float to press the new grout into the joints. This is done holding the float at a 45 degree angle while sliding across the joint. Press the grout into the joint firmly and make sure it is completely filled with grout. If you miss any spots just go back and fill them.

After you are done filling all the joints go back with a dampened sponge and clean off all of the excess grout and residue. At the joint run the sponge diagonally across the joints. This will remove excess grout and smooth the lines. Now let the grout sit and cure for at least 24 hours.

In the Next Step Seal The Grout

Why seal your grout? As mentioned earlier sealing the grout will stop water from soaking into the grout. Sealing also prevents mold from growing and maintains the color of the grout. Grout sealing should be done every 6 months to a year at most to protect your investment.

How to Apply Grout Sealer

Sealing the grout is very straight forward. Make sure the grout is completely dry and cured. The sealer comes in a bottle with an applicator for applying the sealer to the grout.
Working in small sections apply the sealer evenly along and over the grout lines. Avoid overly applying the sealer. Wipe up excess sealer as you go along with a clean rag.

Let dry 24 hours before getting wet. Check all of the grout lines to make sure you didn’t miss any areas. If you missed some areas just reapply and let set another 24 hours. Regular cleaning and maintenance of you tile and grout will give you years of use out of your shower and help you avoid costly repairs.